
Let’s Stream! Part 5: Nvidia Shadowplay (Guide & Performance) (English)

This content is also available in Dutch, click here to switch
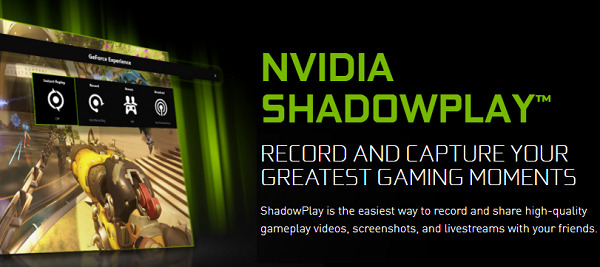
If you’ve given the concept of streaming any thought, chances are that the term OBS will mean something to you. This software is used by the majority of streamers to pimp their stream to the extreme. However, part of the software package that comes with your Nvidia GeForce graphics card is Nvidia Shadowplay, a tool for which Nvidia says it can “Record and Capture your greatest gaming moments” and “Without worrying about video capture impacting your performance”.
That sounded pretty good to us, so in this part we’re going to find out what recording options there are within Shadowplay and If there is a secret performance loss anyway. We’ve also set up our first live stream with it as well.
No installation needed

Chances are that if you installed your GPU drivers you already have the software installed. If not, you unticked the ‘GeForce Experience’ checkbox during the installation and you will want to reinstall it fully to get started. Obviously, it requires an Nvidia GeForce graphics card to do this (AMD users can check out ReLive software), and that’s what we’re using in our streaming rigs.
Now this tool is ridiculously easy. You’re gaming, you press alt+f1 to take a screenshot, press alt+f9 to start/stop recording a gameplay video, and that’s it. It even records your active discord voice chat, which seems like a convenient thing to have when recording multiplayer audio. (it can be turned off if desired).
Video quality is solid too. Default 1080p, 60 FPS and with a 50 Mbps encode quality we find little to complain about, especially considering this content is likely to be shared over social media which limits the quality of the most part anyway. Pixel peeping we can see some compression going on, but nothing that really interferes with the point we’re trying to get across: awesome gameplay moments. Audio quality is equally decent, so no complaints there.
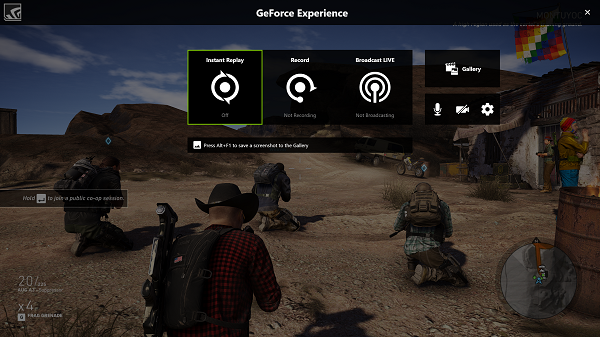
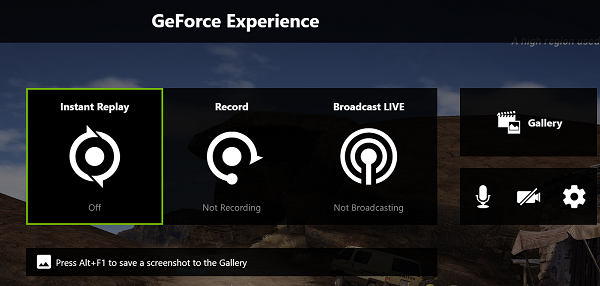
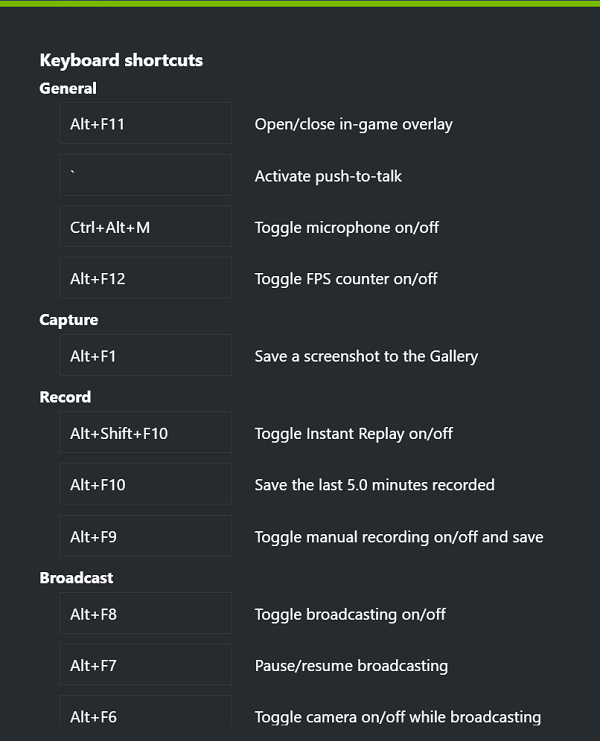
Press Alt-Z to open the Shadowplay overlay for some more details and we’ll see three core elements. Instant Replay, Record, and Broadcast. There are some basic settings to tweak such as the shortcuts (I prefer using Alt-Z for some games, so changed it to Alt-F11 for example), but it’s all pretty basic stuff and if you’re expecting to tweak fine details you’re out of luck. Stats nerds might find reason to complain, but it’s hard to deny that Nvidia kept this extremely accessible for people not deeply involved in tech.
Instant replay

Being able to start/stop recording is great, but chances are you’ll be left with a ton of footage, most of which might not be that interesting. Nvidia is doing a pretty good job at limiting the storage space usage of its recordings as well, but even at about 1 GB per 3 minutes of recording it might stack up before you know it. Especially for those gamers with limited storage space on their SSD’s, so this is definitely something to keep in mind.
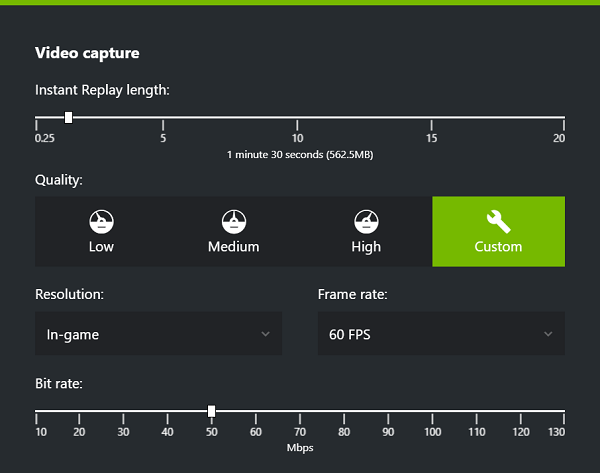
Instant replay sorts both the storage and the excess footage issue. This will basically keep a recording of the last few minutes (you can set the time), and after you had a great gaming moment you simply tell it to save those last few minutes. That way you’ll end up with recordings of your favorite moments, without any extra footage to sort through or eating your precious storage space. Similarly to the previous part, there is very little to tweak here: you can change the recording quality (this actually goes up to 4K which is cool), and you can set how far back the recording should start, but that’s basically it.
An addition to that is the ‘Highlights’ concept. If a game developer added it to their game this will allow the game to automatically trigger recordings in Shadowplay, or a boss fight for example. This won’t work in every game as it does require the game to have that trigger built in. We won’t focus on it due to us mostly working with benchmark routines, but it’s definitely worth considering.
Sharing is caring!

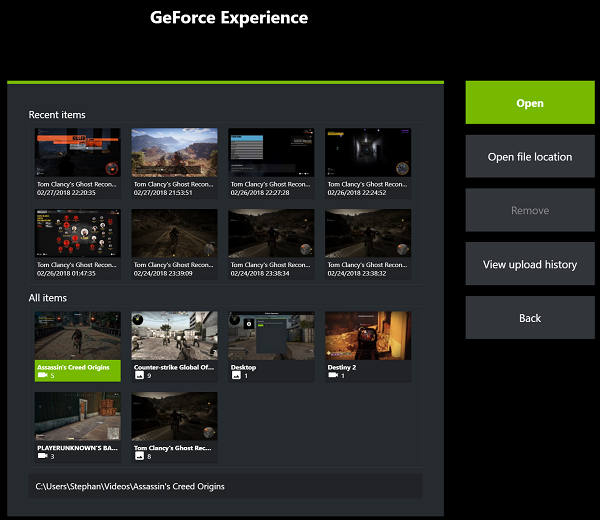
Whether you just made your own recording or are using instant replays, chances are you’ll want to share that video; you don’t need us telling you that you can save that file so you can watch it again later right? Now you can go to YouTube, upload it, or you can do that straight from the Shadowplay gallery. There we find our most recent recordings (screenshots and video’s):
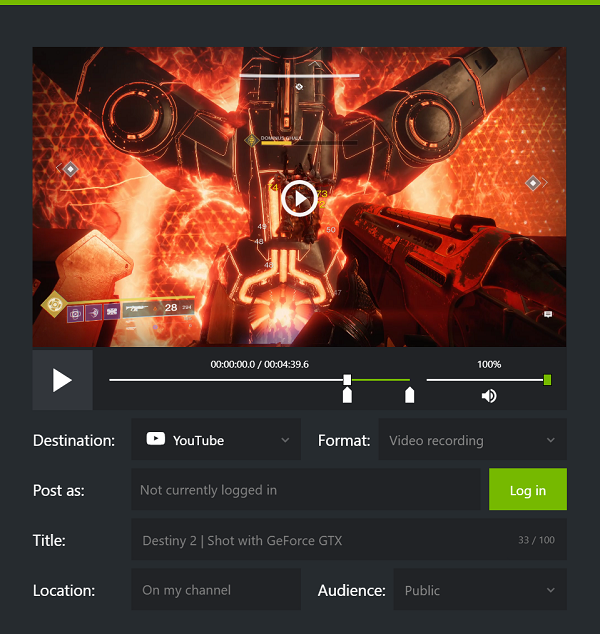
Simply select a recording, we’ll go with our Destiny 2 final boss fight, press share and we can share it directly from there to YouTube, Facebook, Google Photo’s and other platforms. Just log in with your account there, maybe quickly trim the boring parts off, and go. Again, options are very limited. Nvidia’s idea that ease of use is more important than options is somewhat understandable. I love additional settings, but the reality is that most people simply don’t care and prefer a simpler approach. It’s hard to blame Nvidia for that, even though I still wouldn’t mind a secret ‘advanced user’ box somewhere.
Performance?

What we normally do is test what we can. Numbers trump feelings. Nvidia claims we don’t have to worry about performance impact, and obviously we’d love to see that in hard facts. We took our mid-range GTX 1060, Core i5-8400 system for this, as we know our i7 system has plenty of power spare. We tested some games with the recording feature on (manual record, so including file saving), and compared to our baseline from last week:
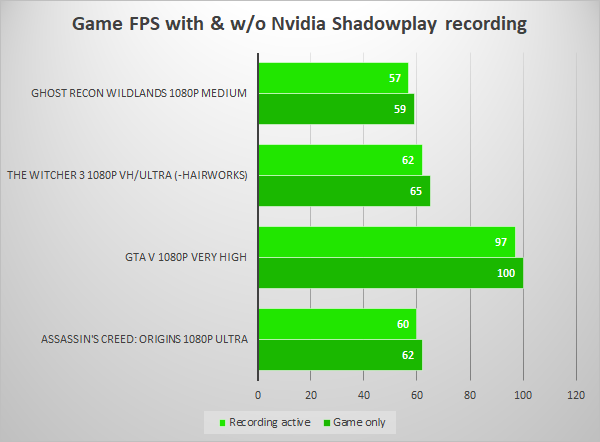
That’s what we call a minimal performance impact. Not zero, but 3% is very little and we’d say not significant, or at least not significant from a user experience point of view. This means no need to tweak your graphics details: if you’re having a good gaming experience you’ll have a decent recording. We won’t delve into frametime details here, neither our recorded frametimes nor 1% lows show any signs of weakness compared to the baseline.
The only spikes we record are at the time of starting or stopping the recording. They’re minor, but enough to make sure you don’t want to start a manual record in the heat of a fight. Not much to consider I’d say: Instant replay you press after the highlight, and manual recording we assume you start running well before the highlight starts.
Long story short : minimal performance impact. Good stuff.
What about streaming?

Considering it’s the title of this series it was inevitable, so we logged into Twitch in Shadowplay (you do need to make a Twitch account if you hadn’t yet), pressed ‘Broadcast’, and our stream was on it’s way. It is literally that easy. You can also go straight to Facebook or YouTube if you prefer.
There are a few minor quality tweaks you can change if you want, like the resolution and frame rate (1080p / 60Hz preferred I suppose), and you change your bitrate as far as your upload speed allows. If you can go for at least 5 with 1080p/60Hz that’s a good start, but you’ll have to figure out what works for your connection.
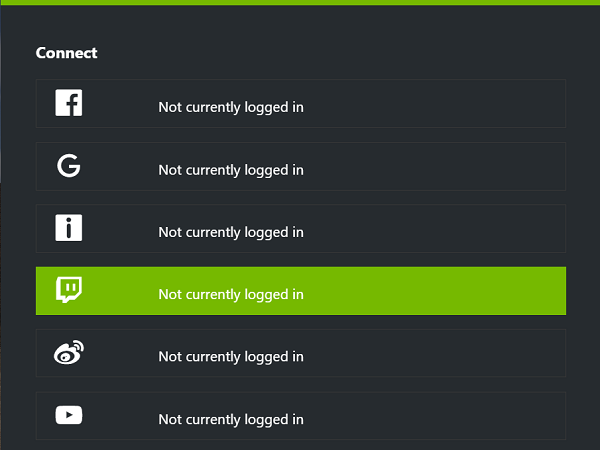
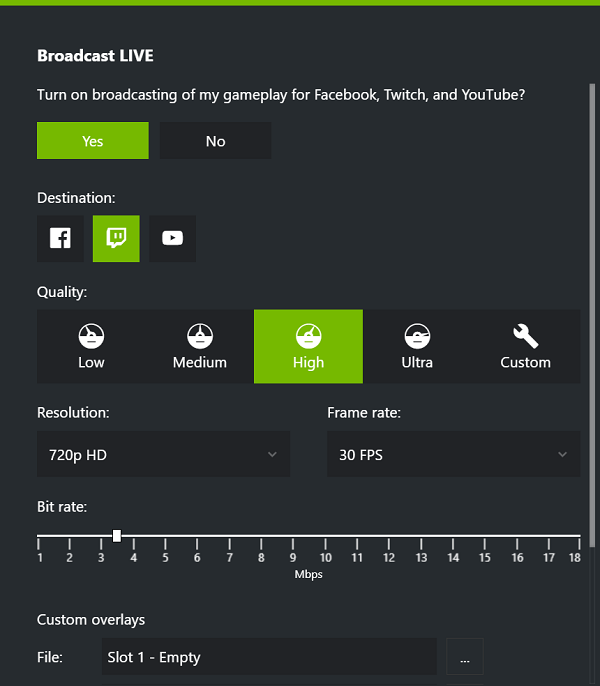
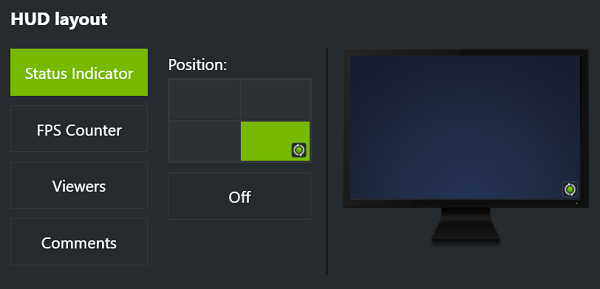
Shadowplay allows you to add some basic extra info. Just like the recording it will automatically stream your discord chat for example, or your in-game voice chat. You can also simply tell it to record your voice only, add your webcam to the corner of your screen, or display you viewer count for example. It’s definitely not OBS flexibility, you can only pick 3 webcam sizes and put it in each of the four corners for example instead of being able to move and drag freely, but this is obviously meant to keep it as simple as possible.
Simple as it may be, streaming quality has left us unconvinced. Happy as we are with the recording quality of Shadowplay, the streaming quality isn’t quite up to the A-standard I feel we should aim for. Even with high quality settings and a fiber connection to back it up, the stream quality never reached that high we wanted. Sometimes it would have thin lines in the stream, we’d have some artifacts in dark screen elements, or we’d see some colours or colourful elements not come out quite right. The lack of settings as far as audio goes also gave us some problems when it came to streaming CS:GO, where regardless of in-game settings the game sounds output would constantly overshadow the voice recording. The lack of tweaks in Shadowplay made it harder for us to get that game streaming properly, although we’re happy that the problem was limited to CS:GO only.
Overall it’s not unusable, but with so many A-quality streams out there we should set a high standard and we soon figured out that OBS reached way better results as far as stream quality goes. Now we’ll discuss OBS in the next part and won’t too far in depth here, but we have to point out that OBS is a significant hit on the system performance while we just showed that Shadowplay isn’t. So make sure you check out next part of this series before you instantly leap at OBS with your mid-range gaming system.
Conclusion

As a streaming tool we find Shadowplay a bit basic, and we’re also not finding that ultimate quality image we were secretly hoping for. If you’re looking to set up the next AAA-quality stream we’d suggest you check out the next part where we setup OBS. However, in that part we’ll also make it painfully obvious that if you are using a mid-range gaming system for streaming in OBS, your performance will suffer. With that in mind Shadowplay even as a streaming tool is not a bad place to start, if you’re not sitting on high-end hardware. After all, the performance impact of Shadowplay is absolutely minimal, a few percent tops, so chances are you’ll never notice it’s running. If you just want to start out and get a feel if streaming is something you want to do more seriously, you can literally do that in two minutes without worrying about your system: if you can play it, you can stream it.
As a recording tool rather than a streaming tool we find Shadowplay damn impressive. Recording fragments is stupidly easy, you can easily share it to popular platforms like YouTube or Facebook, and using the replay tool you won’t have to miss an exciting clip without filling your entire pc with recorded content, and that with a minimal performance impact. As hardware geeks we’d say that some of the options are a bit limited, but we feel Nvidia is doing the right thing to make this tool as easy to use and as accessible as possible for everyone, even if you have no pc experience beyond just playing games.
Whether you have streaming aspirations or not, being able to record some highlights of your gaming experience (carreer? 😉 ) is a big bonus, and so is the fact that it captures things like Discord chat at the same time to add that multiplayer game feel. There is nothing stopping you from finally sharing some recordings of your best gaming moments, and we don’t see how they could have made it any easier to do so.
Overview of all “Let’s Stream” articles:
Part 1: Introduction
Part 2: Building a mid-range Game PC
Part 3: Building a high-end Game PC
Part 4: Let’s Game: Performance baseline for streaming
Part 5: Recording and streaming with Nvidia Shadowplay

Also: only a few days left on our Gigabyte Aorus Z370 Gaming 3 motherboard. Don’t miss out.
GIGABYTE AORUS Z370 Gaming 3 motherboard giveaway!

[wpdevart_facebook_comment curent_url=”https://www.techtesters.eu/lets-stream-part-1-intro-nl/” title_text=”” order_type=”social” title_text_color=”#000000″ title_text_font_size=”1″ title_text_font_famely=”arial” title_text_position=”left” width=”100%” bg_color=”#d4d4d4″ animation_effect=”random” count_of_comments=”10″ ]

